


If you read Part 1 of this post, you should now have an overview of what WordPress is (remember: WordPress.org), how it works, and the pros and cons of using it on your self-hosted website.
I’m going to assume you’ve got your domain name, a webhosting provider, and know how to login to your host’s control panel. In this post, I’ll walk you through installing WordPress on a Bluehost site and configuring common settings in the dashboard.
I won’t go into the steps for creating a blog. If that’s your interest, check out the information on blogging on WordPress.org or the article on WPBeginner.com.
Install WordPress using One-Click Installation
- Login to Bluehost and go to the My Sites panel and choose Add site drop-down menu and click Create New Site.
- Click the Get Started option for Limitless customization
- From the Create a new WordPress site screen, type in site name and tagline if applicable. Click Next
- Choose domain for installation and uncheck premium plugins if you don’t want them installed
- Take a screenshot or print the Congratulations screen with admin username, password, and admin URL for direct login before clicking the Login To WordPress link to enter your site’s WordPress dashboard.
User Account Profile Settings
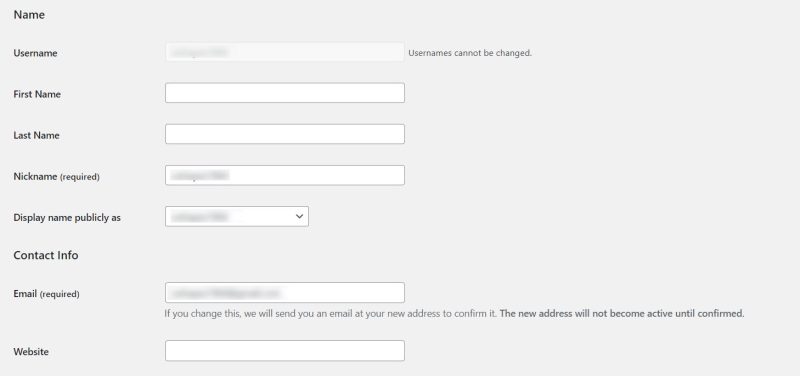
Click on the Users panel on the dashboard. This is where you add or remove users or edit user profiles. You should find a listing for the admin account showing its username, and email. Click on the username to reveal the customization options for the profile.
Under Personal Options you can change the admin color scheme by choosing one of nine presets. This affects only the appearance of the admin dashboard.
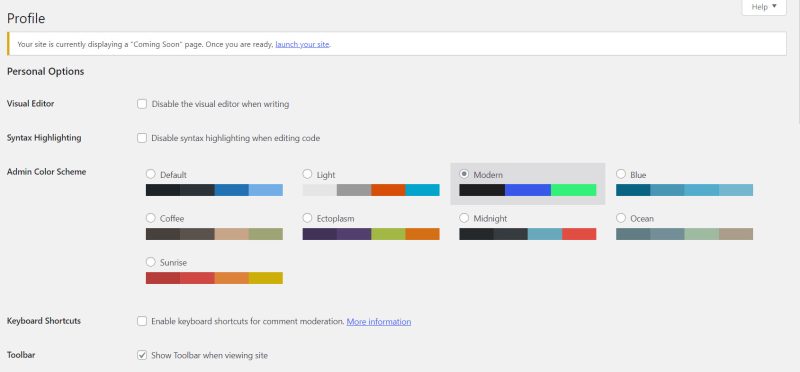
The remaining sections of the screen are self-explanatory, but it is worth noting that you can also change the admin email here and password if desired. It might be good policy to change the admin password every few months to keep your site secure.
Cleanup the Dashboard
Upon logging into WordPress, the dashboard home screen is the first thing you’ll see. Try not to be overwhelmed by the number of widgets vying for your attention. A widget is simply content generated by WordPress or often, one of its plugins—sometimes to inform, but often to encourage you to take some action deemed in your best interests.
I’m all for removing clutter and this screen is a suitable place to start. Using the Screen Options drop-menu in the top left corner, I’ll remove unwanted widgets from my dashboard’s home screen and give myself some breathing room. Any removed items can be added back through the Screen Options menu. Once I’m done removing widgets, I like to rearrange them in an order that makes sense to me.
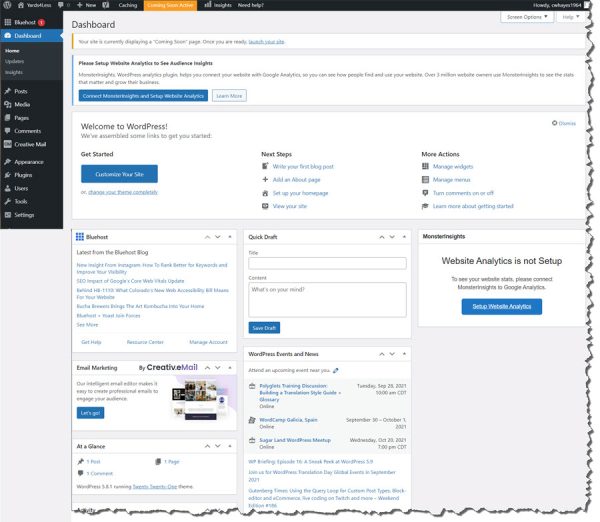
WordPress’ dashboard has too many default widgets
REMINDER: Home screen widgets might be added after you install new plugins. If you don’t want them on the home screen, use the above method to hide them.
Configure Core WordPress Settings
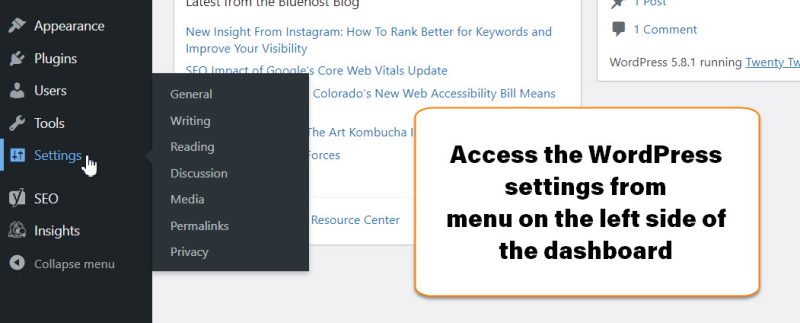
Our next task will be to configure WordPress settings to help the site operate smoothly and consistently. The settings can be found on the dashboard sidebar menu near the bottom left of the screen. I’ll go through the settings that need to be changed now. After the site theme setup is complete, I’ll revisit setting up others I’ve skipped. Stay with me.
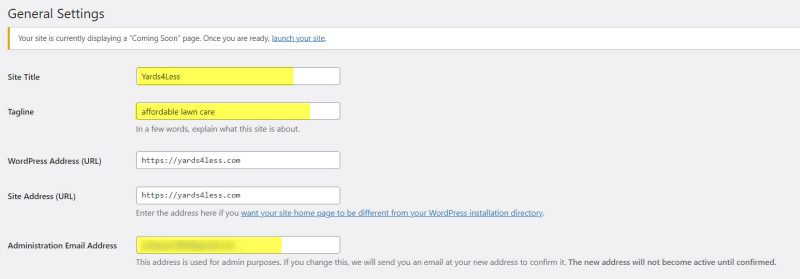
General Settings
The top portion of the general settings window contains site identification information, including the administrator’s email. You’ll want to add in your site name and tagline, if applicable and verify the administrator’s email is correct.
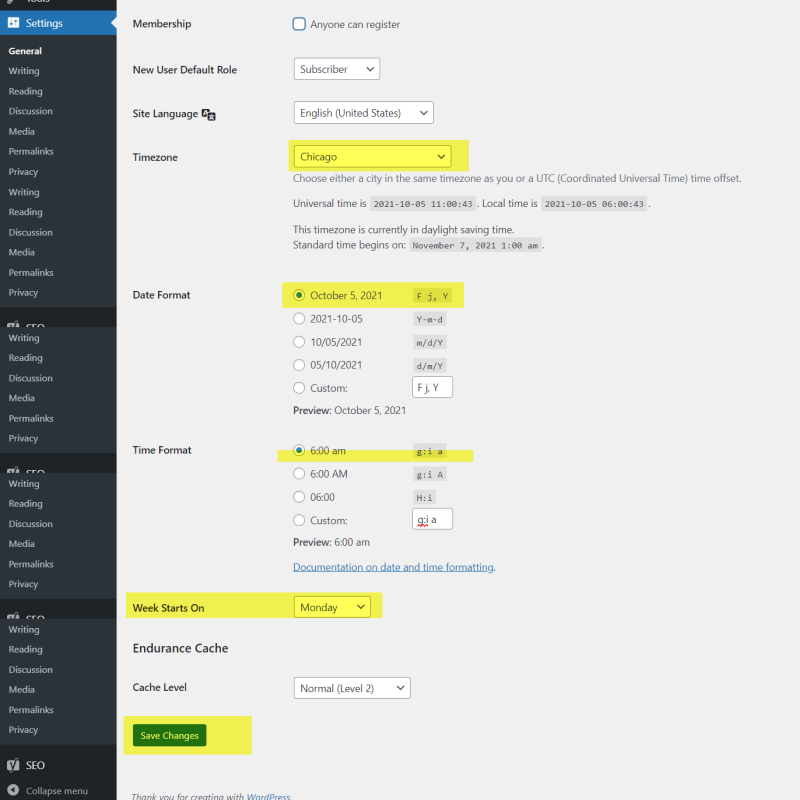
The bottom portion of this screen contains language, time zone, and date settings. By default, the Universal Time Coordinated (UTC) setting is set to +0. Select your locations from the drop-down list by selecting a corresponding city or, if you know it, select the correct UTC offset (in my case its +6, the same as Chicago or CST in the U.S.). Save your changes.
Reading Settings
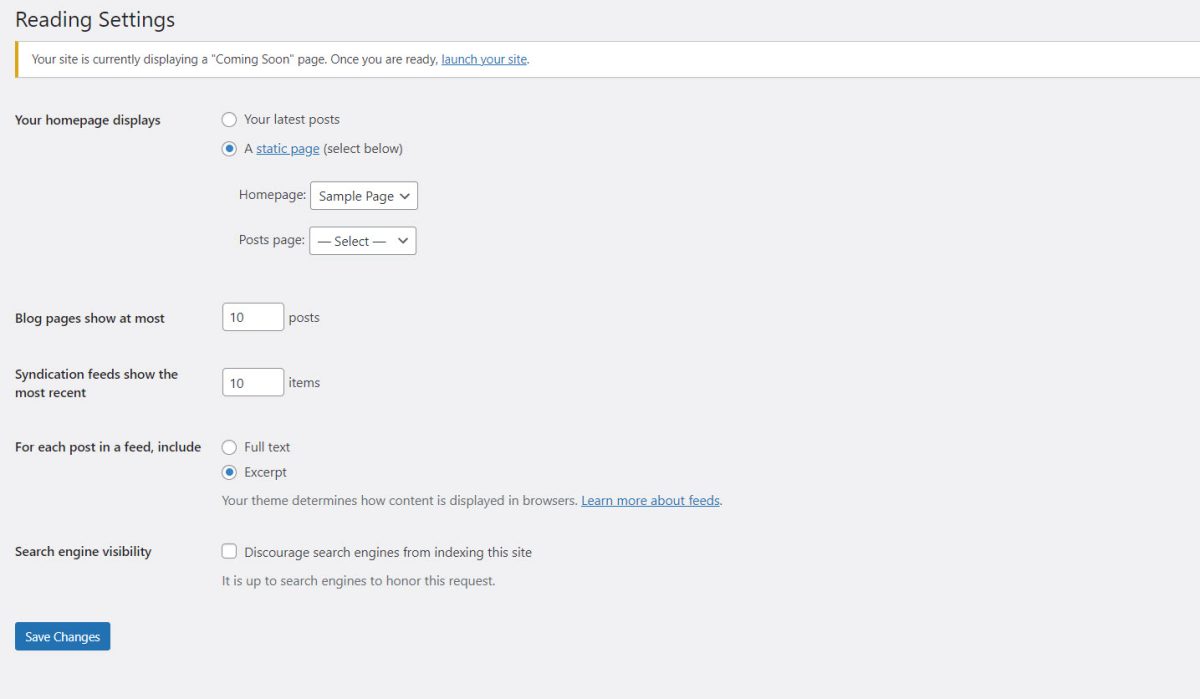
The reading section allows you to define what your home page displays—a static front page or your latest blog posts. Since we’re not creating a blog in this example, and have yet to create content, I’ve elected to make it the sample page in the default Twenty Twenty-One theme. I’ve also changed the post format in a feed to excerpt and made sure that the Search Engine Visibility Option Remains unchecked. I’ll return to this screen once I’ve created my home page and point the settings to it.
Save your changes.
Disable Comments in Discussion Settings
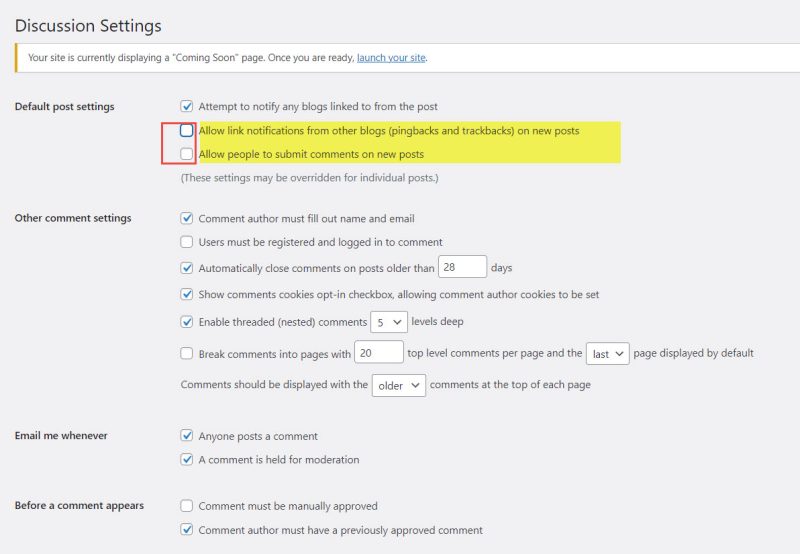
Because I’m setting up a small business website, I don’t want site visitors leaving comments because I’ll be too busy mowing lawns, I won’t have time to respond to them or fight the spam that comes along with allowing them. So, without going into too much detail, there’s only two settings I’m concerned about in the Discussion settings. Uncheck Allow people to submit comments on new posts and uncheck Allow link notifications from other blogs. Save your changes.
Later, I’ll go in and remove all existing comments that exists on sample posts.
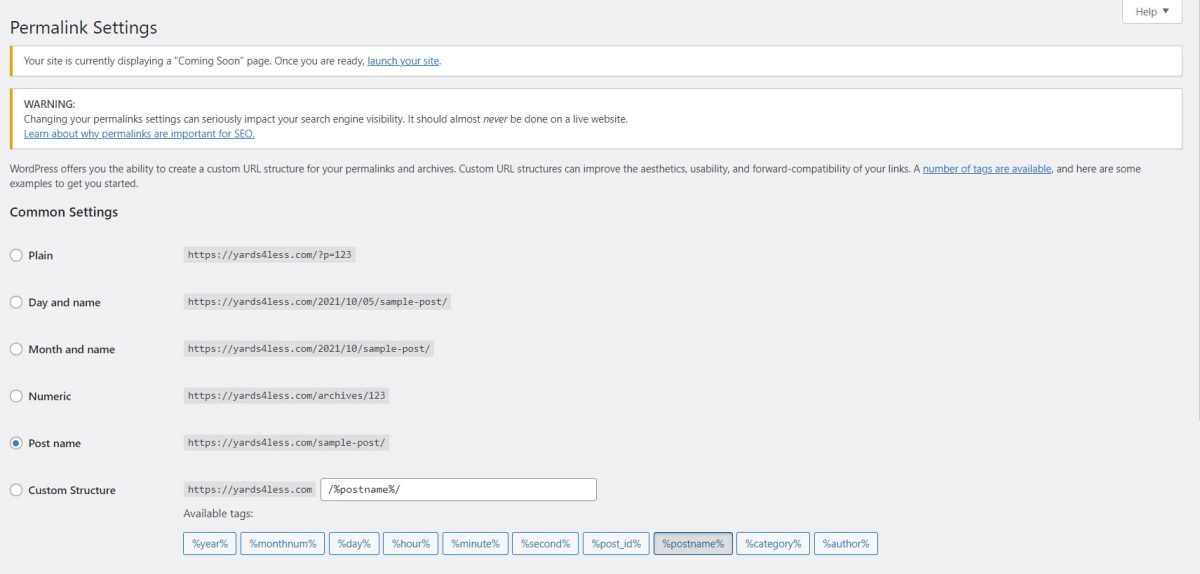
Adjust Permalink Structure
A permalink or ‘permanent link’ is the complete URL for each website page or post. It often includes the site’s domain name, followed by a slug pointing to a unique page or post. Search engines such as Google, index site permalinks and later publish these in search results. To make the structure friendly for Search Engine Optimization (SEO), and easier for visitors to find you, go to the Permalink Settings and change the Permalink structure to Post name. Save your changes.
Privacy Settings
Even if you don’t have a blog, a privacy policy page is recommended, since you might knowingly or unknowingly collect user information, such as name and email addresses in contact or registration forms or may track user activity through Google Analytics, social media sharing, browser cookies, or other plugins. A privacy policy page discloses to site visitors how such information is collected and used.
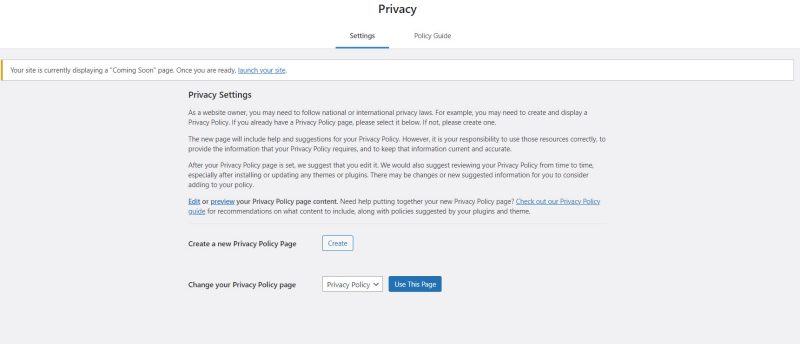
To keep things moving I won’t address a privacy policy page here. If you decide to create one, read this article from WordPress.org.
In Part 3 of this post, I’ll discuss importing and customizing a WordPress theme and installing and configuring some basic plugins.
Share This Story!
Related Posts


If you read Part 1 of this post, you should now have an overview of what WordPress is (remember: WordPress.org), how it works, and the pros and cons of using it on your self-hosted website.
I’m going to assume you’ve got your domain name, a webhosting provider, and know how to login to your host’s control panel. In this post, I’ll walk you through installing WordPress on a Bluehost site and configuring common settings in the dashboard.
I won’t go into the steps for creating a blog. If that’s your interest, check out the information on blogging on WordPress.org or the article on WPBeginner.com.
Install WordPress using One-Click Installation
- Login to Bluehost and go to the My Sites panel and choose Add site drop-down menu and click Create New Site.
- Click the Get Started option for Limitless customization
- From the Create a new WordPress site screen, type in site name and tagline if applicable. Click Next
- Choose domain for installation and uncheck premium plugins if you don’t want them installed
- Take a screenshot or print the Congratulations screen with admin username, password, and admin URL for direct login before clicking the Login To WordPress link to enter your site’s WordPress dashboard.
User Account Profile Settings
Click on the Users panel on the dashboard. This is where you add or remove users or edit user profiles. You should find a listing for the admin account showing its username, and email. Click on the username to reveal the customization options for the profile.
Under Personal Options you can change the admin color scheme by choosing one of nine presets. This affects only the appearance of the admin dashboard.
The remaining sections of the screen are self-explanatory, but it is worth noting that you can also change the admin email here and password if desired. It might be good policy to change the admin password every few months to keep your site secure.
Cleanup the Dashboard
Upon logging into WordPress, the dashboard home screen is the first thing you’ll see. Try not to be overwhelmed by the number of widgets vying for your attention. A widget is simply content generated by WordPress or often, one of its plugins—sometimes to inform, but often to encourage you to take some action deemed in your best interests.
I’m all for removing clutter and this screen is a suitable place to start. Using the Screen Options drop-menu in the top left corner, I’ll remove unwanted widgets from my dashboard’s home screen and give myself some breathing room. Any removed items can be added back through the Screen Options menu. Once I’m done removing widgets, I like to rearrange them in an order that makes sense to me.
WordPress’ dashboard has too many default widgets
REMINDER: Home screen widgets might be added after you install new plugins. If you don’t want them on the home screen, use the above method to hide them.
Configure Core WordPress Settings
Our next task will be to configure WordPress settings to help the site operate smoothly and consistently. The settings can be found on the dashboard sidebar menu near the bottom left of the screen. I’ll go through the settings that need to be changed now. After the site theme setup is complete, I’ll revisit setting up others I’ve skipped. Stay with me.
General Settings
The top portion of the general settings window contains site identification information, including the administrator’s email. You’ll want to add in your site name and tagline, if applicable and verify the administrator’s email is correct.
The bottom portion of this screen contains language, time zone, and date settings. By default, the Universal Time Coordinated (UTC) setting is set to +0. Select your locations from the drop-down list by selecting a corresponding city or, if you know it, select the correct UTC offset (in my case its +6, the same as Chicago or CST in the U.S.). Save your changes.
Reading Settings
The reading section allows you to define what your home page displays—a static front page or your latest blog posts. Since we’re not creating a blog in this example, and have yet to create content, I’ve elected to make it the sample page in the default Twenty Twenty-One theme. I’ve also changed the post format in a feed to excerpt and made sure that the Search Engine Visibility Option Remains unchecked. I’ll return to this screen once I’ve created my home page and point the settings to it.
Save your changes.
Disable Comments in Discussion Settings
Because I’m setting up a small business website, I don’t want site visitors leaving comments because I’ll be too busy mowing lawns, I won’t have time to respond to them or fight the spam that comes along with allowing them. So, without going into too much detail, there’s only two settings I’m concerned about in the Discussion settings. Uncheck Allow people to submit comments on new posts and uncheck Allow link notifications from other blogs. Save your changes.
Later, I’ll go in and remove all existing comments that exists on sample posts.
Adjust Permalink Structure
A permalink or ‘permanent link’ is the complete URL for each website page or post. It often includes the site’s domain name, followed by a slug pointing to a unique page or post. Search engines such as Google, index site permalinks and later publish these in search results. To make the structure friendly for Search Engine Optimization (SEO), and easier for visitors to find you, go to the Permalink Settings and change the Permalink structure to Post name. Save your changes.
Privacy Settings
Even if you don’t have a blog, a privacy policy page is recommended, since you might knowingly or unknowingly collect user information, such as name and email addresses in contact or registration forms or may track user activity through Google Analytics, social media sharing, browser cookies, or other plugins. A privacy policy page discloses to site visitors how such information is collected and used.
To keep things moving I won’t address a privacy policy page here. If you decide to create one, read this article from WordPress.org.
In Part 3 of this post, I’ll discuss importing and customizing a WordPress theme and installing and configuring some basic plugins.